
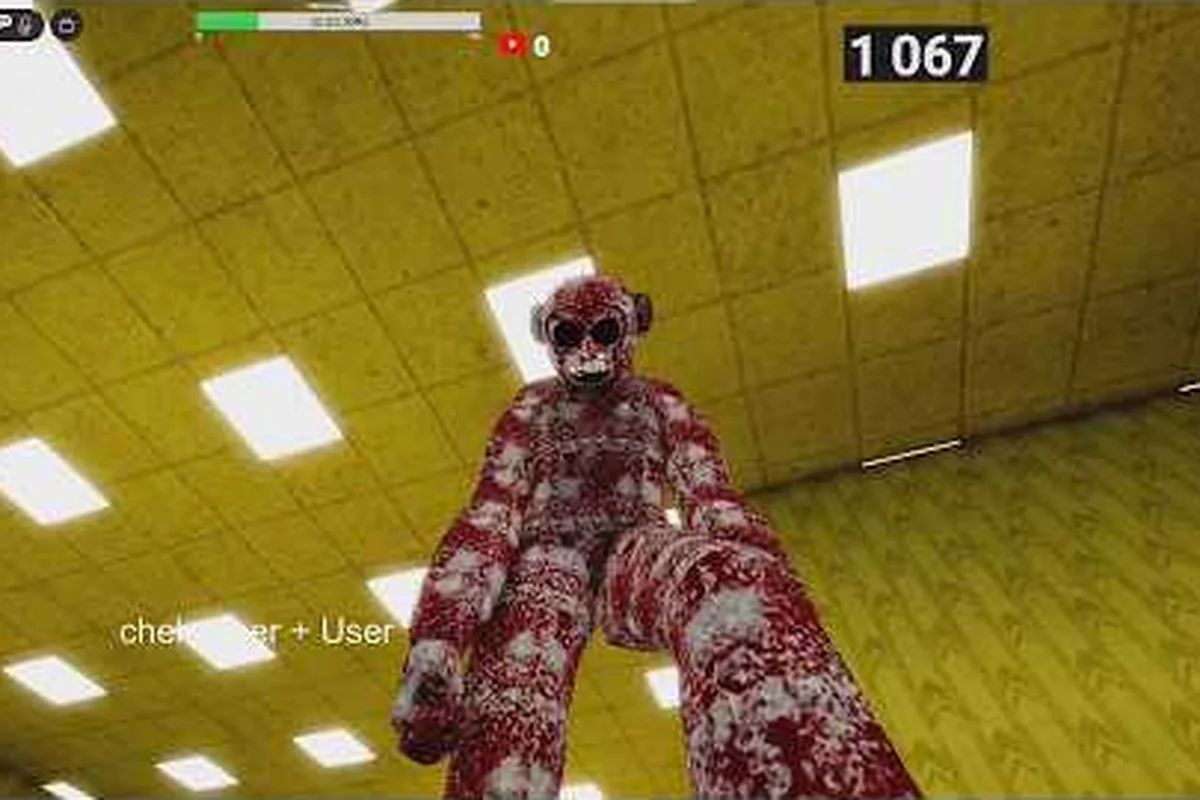
A single wrong turn inside the Lethal Ape lab is the difference between a clean extraction and a respawn screen. This survival guide covers the chase mechanics, stamina management, and map-specific escape paths that separate a successful first run from a frustrating wipe, with practical data pulled from the community wiki, walkthrough videos, and beginner resources like Pro Game Guides' Lethal Ape Beginner's Guide.
Understanding the Chase System and Monster Behavior
The ape in Lethal Ape does not behave like a standard Roblox horror NPC. It patrols fixed routes, reacts to sound and line-of-sight, and switches into a relentless sprint once it locks onto a player. Learning the difference between those three states is the foundation of any serious survival run.
Patrol, Investigate, and Chase States
The monster cycles through three behavior states, and each one gives you a different window of opportunity. Community testing on the official YouTube walkthrough by Chekneker confirms that most first-time players die because they cannot read the transition between states.
| State | Trigger | Speed | Player Window |
|---|---|---|---|
| Patrol | Default, no player contact | Slow walk | Free to loot, move, or break line-of-sight |
| Investigate | Heard noise or brief sighting | Moderate jog | Roughly 3–5 seconds to hide or reposition |
| Chase | Direct line-of-sight for ~1 second | Full sprint | Must break line-of-sight immediately or die |
The key insight is that the ape only enters Chase after holding line-of-sight on you for a short window. Flash your shoulder past a doorway and immediately duck back, and it usually returns to Investigate rather than locking in. This trick is the single most important habit new players can build.
Stamina, Noise, and Why Sprinting Gets You Killed
Every action in Lethal Ape drains stamina, and stamina is also your sprint resource. If you sprint through the entire Lab because the ape spotted you, you will be standing still gasping for breath right when you need a final burst to clear a doorway. Community data from the r/robloxlethalape subreddit shows that stamina exhaustion is the leading cause of death among new players, ahead of getting cornered.
-
Walking is silent and costs no stamina — use it whenever the ape is in Patrol.
-
Crouching is even quieter and slightly reduces detection radius — use it near doorways.
-
Sprinting drains stamina fast and produces loud footstep audio — reserve it for confirmed Chase moments.
-
Jumping costs a flat stamina chunk and is the loudest single action — almost never worth it.
The Lab: Default Map Survival Route
The Lab is the first environment every new player runs, and it is also where most deaths happen because the layout is not explained anywhere in-game. According to the Lethal Ape Caves gamemode, Lethal Ape intentionally has no in-game map, so route memory is a core skill. If you are still learning the basics of movement and menus, the Lethal Ape beginner overview covers the controls and gold economy before you worry about chase tactics.
Memorizing the Four Critical Rooms
On a typical first run, the Lab has four rooms that determine whether you escape or not. Treat them as a mental checklist, not a random walk.
| Room | Primary Threat | Key Item / Action | Priority |
|---|---|---|---|
| Entry Bay | None yet | Grab torch, check spawns | Low |
| Yellow Room | Ape patrols in from the south | Find the yellow keycard on the side table | High |
| Storage Corridor | Tight, single chokepoint | Loot Copper and Gold off respawn racks | Medium |
| Exit Hall | Ape tends to camp the door | Wait for patrol to pass, then sprint | Critical |
The Yellow Room is the single most-lost location in the Lab. Community help threads on Reddit repeatedly flag it as the place where new players get trapped because the ape enters from a doorway they did not know was open. The trick is to enter the Yellow Room only after hearing the ape's footsteps move away for at least two patrol cycles, then grab the keycard and leave through the opposite door. For a deeper layout breakdown, the Yellow Room escape map shows the door geometry and patrol entry points in detail.
Loot Priority on a First Run
Speed matters more than greed on your first run. Every second you spend fumbling with a container is a second the ape has to close distance. A clean escape with 200 gold is worth more than a wipe with 800 gold.
| Loot Type | Risk Level | Take It? |
|---|---|---|
| Gold (respawn racks) | Medium — racks near patrol routes | Yes, every time |
| Copper (loose piles) | Low — usually in side rooms | Yes if path is clear |
| Shop keys (rare) | High — ape often camps the room | Only if patrol is far |
| Cosmetic items | Any | Skip on first run |
The Forest and the Caves: Map-Specific Escape Tactics
Once you unlock the Gamemodes Room, you can access the Forest and Caves, both of which apply the same chase fundamentals but with completely different terrain. The Lethal Ape secret rooms and badges guide walks through how to actually unlock the Gamemodes Room, but this section assumes you have access.
Forest: Line-of-Sight and Tree Cover
The Forest is brighter than the Lab, which sounds like an advantage but is actually a trap. More light means the ape can see you from farther away, and the trees give chase-state monsters a long, uninterrupted sightline. The core tactic is to use tree trunks as line-of-sight blockers, not as hiding spots. Walk behind a trunk, crouch, and wait for the patrol to pass — the ape will not circle back to check if you are still there.
| Forest Hazard | Detection Range | Safe Counter |
|---|---|---|
| Open meadow | Very long (full sprint trigger) | Crouch-walk across, never sprint |
| Tree line | Medium (Patrol only) | Use trunks as walls |
| Old cabin | Short, but ape patrols in | Loot fast, exit through back window |
| River crossing | Short, but loud splashing | Cross only at shallow rocks |
Caves: Darkness as Your Ally
The Caves are the opposite problem. According to the community wiki's Caves page, the central feature is a wooden platform crossing a gap that leads to an outside zone with an abandoned storage area — the community's standard exit. Navigation is the primary threat, not the ape, because the darkness is almost total outside the platform. Bring a torch or use the ambient glow from Copper deposits to avoid falling into the pit.
| Cave Section | Light Level | Survival Rule |
|---|---|---|
| Entry tunnel | Low | Walk the wall, do not cross the center |
| Central platform | Very low | Crouch-walk, hold the handrail |
| Storage area | Medium (ambient Copper) | Loot and exit, ape patrols every 60 seconds |
| Exit ladder | Low | Climb only when patrol footsteps are distant |
The wooden platform is the single most dangerous feature in the game. A single sprint across it produces heavy footstep noise and can trigger a chase through the gap below. Walk it, crouch-walk if you hear the ape nearby, and never jump.
Smart Escape Routes: Breaking Line-of-Sight and Resetting Chase
Even with perfect map knowledge, you will sometimes trigger a chase. What separates a successful escape from a wipe is knowing how to break the chase-state and reset the ape to Patrol. The Rullaby Games gold farming video demonstrates several of these resets in real time, and the community has refined them into a reliable playbook.
The Four Reset Techniques
| Technique | When to Use | How It Works | Success Rate (community estimate) |
|---|---|---|---|
| Door slam | Ape chasing through Lab | Close door behind you, crouch in adjacent room | ~70% |
| Line-of-sight break | Open Forest or Cave | Duck behind solid cover for 3+ seconds | ~80% |
| Co-op split | Playing with a partner | Both players move to opposite rooms, ape picks one | ~90% |
| Sound decoy | Ape in Investigate state | Throw a loose object away from your path | ~60% |
The door slam is the most underrated reset. Many Lab doors close behind the player with a heavy thud, and the ape's Investigate behavior often drops to Patrol once it loses the trail at a closed door. The key is to close the door fully and crouch in the next room rather than continuing to run.
Solo vs. Co-op Survival Differences
Playing solo and playing in a co-op party change the math significantly. The monster's attention economy is shared in co-op, which is a major advantage, but it also means one careless player can drag the ape toward the whole team.
| Factor | Solo Run | Co-op Run |
|---|---|---|
| Detection radius | Affects only you | Affects all players |
| Ape attention | Always on you | Can be split between players |
| Loot speed | Slow, one looter | Fast, multiple looters |
| Rescue chance | None if you go down | One player can distract while another escapes |
| Risk of friendly fire (noise) | N/A | High — one sprint can trigger a chase for the whole team |
If you are playing co-op, assign one player as the designated "sacrificial decoy" role. That player carries a low-value loadout and intentionally draws the ape when the team needs to loot the Storage Corridor or the Yellow Room. It sounds harsh, but it is the standard strategy reported by experienced co-op players.
Advanced Survival Tips: Gold, Patience, and Run Discipline
Surviving a single run is mostly about mechanics. Surviving consistently across ten, twenty, or fifty runs is about discipline. The community-run r/robloxlethalape threads show a clear pattern: players who escape on more than half their runs almost always follow a small set of habits that newer players ignore.
Pre-Run Checklist
Before you even load into the Lab, run through this mental checklist. Skipping any of these steps is the most common cause of mid-run panic.
-
Audio check: confirm your headphones or speakers are working — the ape's audio cues are louder than its visual cues.
-
Stamina awareness: if you spawned near the ape, do not sprint. Walk for the first 10 seconds.
-
Mental map: pick your exit route before you take your first step. The Lab exit is a fixed location, not a discovered one.
-
Loot discipline: decide in advance which containers you will skip. Greed kills runs.
Mid-Run Decision Matrix
When you hear the ape and you are not sure whether it has spotted you, use this quick decision matrix. It is the same logic experienced players apply without thinking, but writing it down is the fastest way to internalize it.
| Situation | Ape State (Infer) | Correct Action |
|---|---|---|
| Footsteps distant, no music cue | Patrol | Continue looting, stay on the planned route |
| Footsteps getting closer, faint music | Investigate | Stop moving, crouch, look for a hiding spot |
| Loud music, footsteps fast | Chase | Break line-of-sight behind nearest solid cover, hold position for 5 seconds |
| Music stops, footsteps fade | Returning to Patrol | Wait 3 more seconds, then resume route slowly |
The faint music cue is the single best early-warning signal in the game. If you hear the music swell, you are already in Investigate and have maybe three seconds before Chase locks in. Stop moving immediately, do not crouch-walk yet, and just listen. Many players panic-sprint the moment they hear music, which is the exact opposite of what saves them.
Common First-Run Mistakes and How to Fix Them
| Mistake | Why It Fails | Better Approach |
|---|---|---|
| Sprinting everywhere | Drains stamina, generates noise | Walk by default, sprint only on confirmed chase |
| Greed-looting every container | Adds 20–40 seconds of exposure | Set a loot target before entering each room |
| Ignoring the music cue | Misses the Investigate window | Treat music swell as a hard stop signal |
| Re-entering a room the ape just left | Ape often doubles back | Wait one full patrol cycle before re-entering |
| Playing with no audio | Removes 60% of your warning system | Always play with sound on, even on a second monitor |
Building a Sustainable Run Cadence
The most common reason players quit Lethal Ape after a few runs is frustration, and frustration usually comes from running the Lab over and over with the same mistakes. Instead, build a cadence. Do three "scout runs" where you ignore Gold entirely and only focus on map memory and ape behavior. Then do three "loot runs" where you take a known-safe path and farm Gold aggressively. Then attempt a real escape run. This rotation keeps each run feeling different and trains both your mechanics and your route knowledge at the same time.
Frequently Asked Questions
What is the fastest way to escape the Lab on a first run?
Move directly to the Yellow Room, wait for the ape's patrol to pass, grab the yellow keycard, and head for the Exit Hall without looting Copper or Gold. A clean no-loot escape typically takes under 4 minutes and is the safest first run. Once you can do this consistently, add a single Gold rack on the way out.
Does the ape see you through doors in Lethal Ape?
No, the ape cannot see you through closed doors, but it can hear you if you sprint or jump near them. Close the door fully and crouch in the adjacent room, and it will usually return to Patrol within a few seconds. This door-slam reset works in roughly 70% of chase situations, according to community testing.
Should I sprint when the ape is chasing me in Lethal Ape?
Only if you have a confirmed clear line to a hiding spot within a few meters. Sprinting drains stamina fast, and if you run out mid-chase you will be standing still when the ape arrives. In most cases, breaking line-of-sight with a quick directional change and crouching behind cover is more reliable than a full sprint.
Is co-op easier than solo for Lethal Ape survival runs?
Yes, co-op is significantly easier because the monster's attention can be split. One player can act as a decoy while the other loots or escapes. The trade-off is that one careless teammate can drag the ape toward the whole group, so voice chat or callouts are essential for coordinated runs.
How do I unlock the Caves and Forest gamemodes?
You need to find the Gamemodes Room, which is hidden behind a secret door accessed from the Lab. The unlock process involves specific badge and item requirements detailed in the badges walkthrough. Once unlocked, both gamemodes apply the same chase mechanics as the Lab but with different terrain and lighting.